Mystery Solved: The 7-Step Method for Identifying Any Unknown Tool
The short answer: identify any mystery tool by working through what it does (form follows function), its construction era, and its maker’s marks — or skip the legwork and upload a photo to our free AI identifier, which names most common tools in seconds. For obscure vintage pieces, AI narrows the category and communities like r/whatisthisthing handle the specifics.
A few years back I paid $3 for a piece of what looked like scrap iron at a Lancaster County estate sale. The woman running the sale had no idea what it was. The guy browsing next to me didn’t know either. It was a weird half-moon blade riveted to a curved wooden handle, with a toothed lip on one edge.
Turned out to be a coopers’ croze — a specialty tool for cutting the groove in barrel staves that holds the head in place. It’s worth about $60 on a good day, more if it has a maker’s mark. I paid $3 because neither of us knew what we were looking at.
This happens constantly. Garages, estate sales, barn cleanouts — they’re full of tools that nobody can name. Some are common tools nobody recognizes because they’ve been replaced by modern equivalents. Some are genuine specialties that saw decades of professional use before disappearing. And some are genuinely obscure pieces of industrial or agricultural history that even experienced collectors puzzle over.
Here’s the framework I use to identify any unknown tool, from a common wrench to a mystery piece of Victorian coopering equipment.
Step 1 — Is It Even a Tool?
This sounds obvious. It isn’t. Plenty of hardware, mechanical parts, jigs, fixtures, and random metal stampings look tool-like but aren’t tools in the sense of “a hand-operated implement used to do work.”
Three questions that settle it in 30 seconds:
First: Is there a hand-hold? Tools almost always have a handle, grip surface, or a part clearly designed to be held. If you can’t find the holding position, it might be a part rather than a standalone tool.
Second: Does it do one specific thing? Good tools have a clear singular purpose. If you can’t describe the action — cut, grip, measure, strike, shape, fasten — it may be a fixture or a jig designed to hold something rather than do something.
Third: Is there moving wear? Look for polished contact surfaces, worn edges where friction occurred repeatedly, and mechanical pivot points that show use. A well-used tool shows wear patterns consistent with its function.
If it passes those three checks, it’s almost certainly a tool. Now figure out what kind.
Step 2 — What Does It Do? Form Follows Function
Every tool’s shape is a direct consequence of its job. Read the shape and you’ll get close to the function.
Cutting tools have a beveled edge, usually thin and hard at the cutting face. Chisels, plane irons, knife blades, drawknives, spokeshaves — the geometry says “remove material.” If there’s a sharp edge involved, you’re in cutting territory.
Gripping and turning tools have jaws, serrated surfaces, or internal mechanisms designed to apply torque or hold an object. Pliers, wrenches, vises, clamps — they’re about control and force application, not removal.
Striking tools are heavy on one end and have a handle designed for swinging. Hammers, mallets, mauls, axes. The weight distribution and swing balance are the giveaways.
Measuring tools have consistent scales, calibrated markings, or a precision reference surface. Calipers, gauges, rules, squares. Accuracy is their whole job.
Shaping tools remove material gradually rather than making a single cut. Files, rasps, planes, spokeshaves, scrapers — they refine rather than remove in bulk.
Once you’ve identified the functional category, you’ve narrowed the field from thousands of possible tools down to dozens.
Step 3 — Construction Era and Manufacturing Clues
When a tool was made tells you a lot about who made it and where to look for information.
Pre-1900 American tools are almost always cast iron or forged steel. Casting quality on pre-Civil War American tools is often rough — file marks, casting flash, uneven surfaces. Post-1870, manufacturing quality improved significantly, and you start seeing machined flat surfaces and consistent dimensional tolerances.
1900–1940 is the golden era for most American hand tools. This is when Stanley, Disston, Millers Falls, Sargent, and dozens of regional makers were competing aggressively on quality. The japanning (black lacquer finish) on good tools from this period is still remarkably intact on unused examples. Handle materials tell a story too: rosewood and applewood for quality tools, beech and birch for production-grade work.
Post-WWII is where quality starts diverging sharply. Premium makers kept standards up, but the mass market shifted to cheaper manufacturing. Cast iron gave way to pot metal in some tool categories. Handle wood went from hardwood to pressed wood composites.
Synthetic handles generally mean post-1950, often post-1970. If the handle is Bakelite or early plastic, that helps date it even without a maker’s mark.
Look closely at machined surfaces. Hand-file marks indicate earlier manufacture. Consistent machine grinding is a post-1900 indicator. Precision castings with tight tolerances point to 1920s and later.
Step 4 — Maker’s Marks, Logos, and Stamps
This is where identification gets specific. A maker’s mark turns a “what is this?” into a “what is this, made by whom, when.”
Where to look: The most common stamp locations are the blade or working face, the heel or toe of the tool (the end away from the working edge), the tang if there is one (the metal piece that inserts into a handle), and the handle hardware.
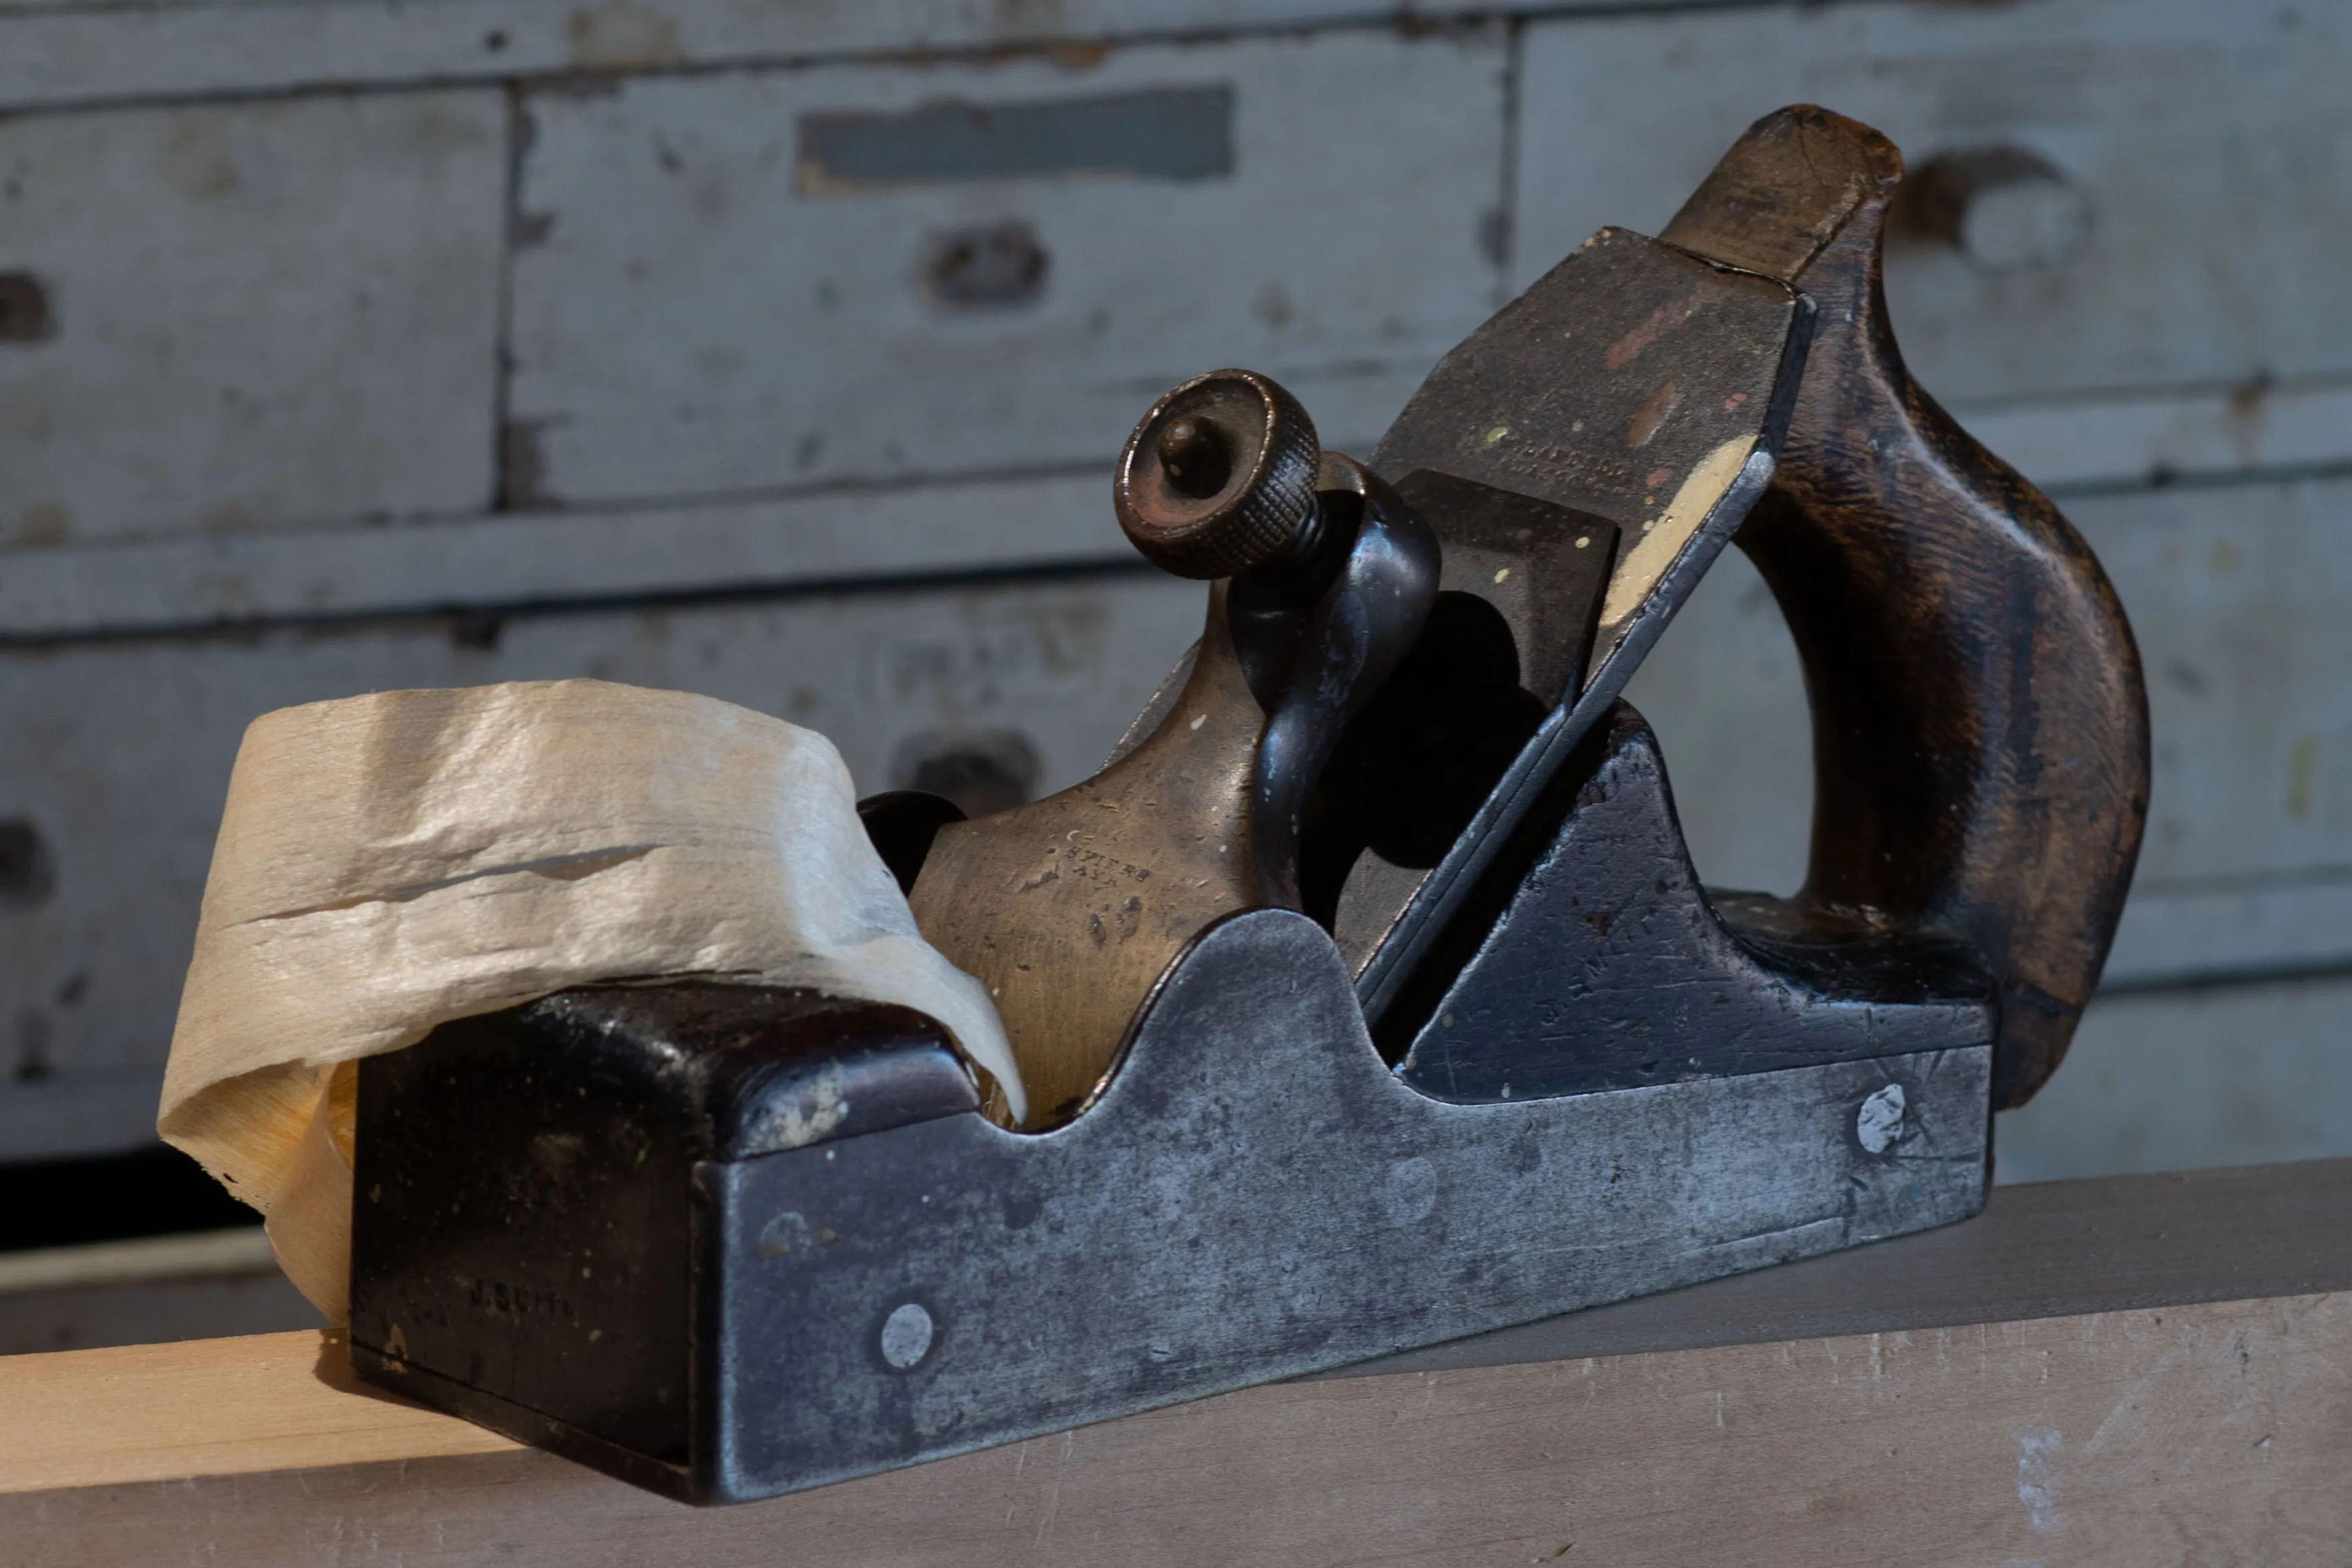
On planes: check the toe of the casting, the blade itself, and the lever cap. Stanley stamped their model number on the blade and the lever cap. The frog (the angled casting that holds the blade) sometimes carries a patent date.
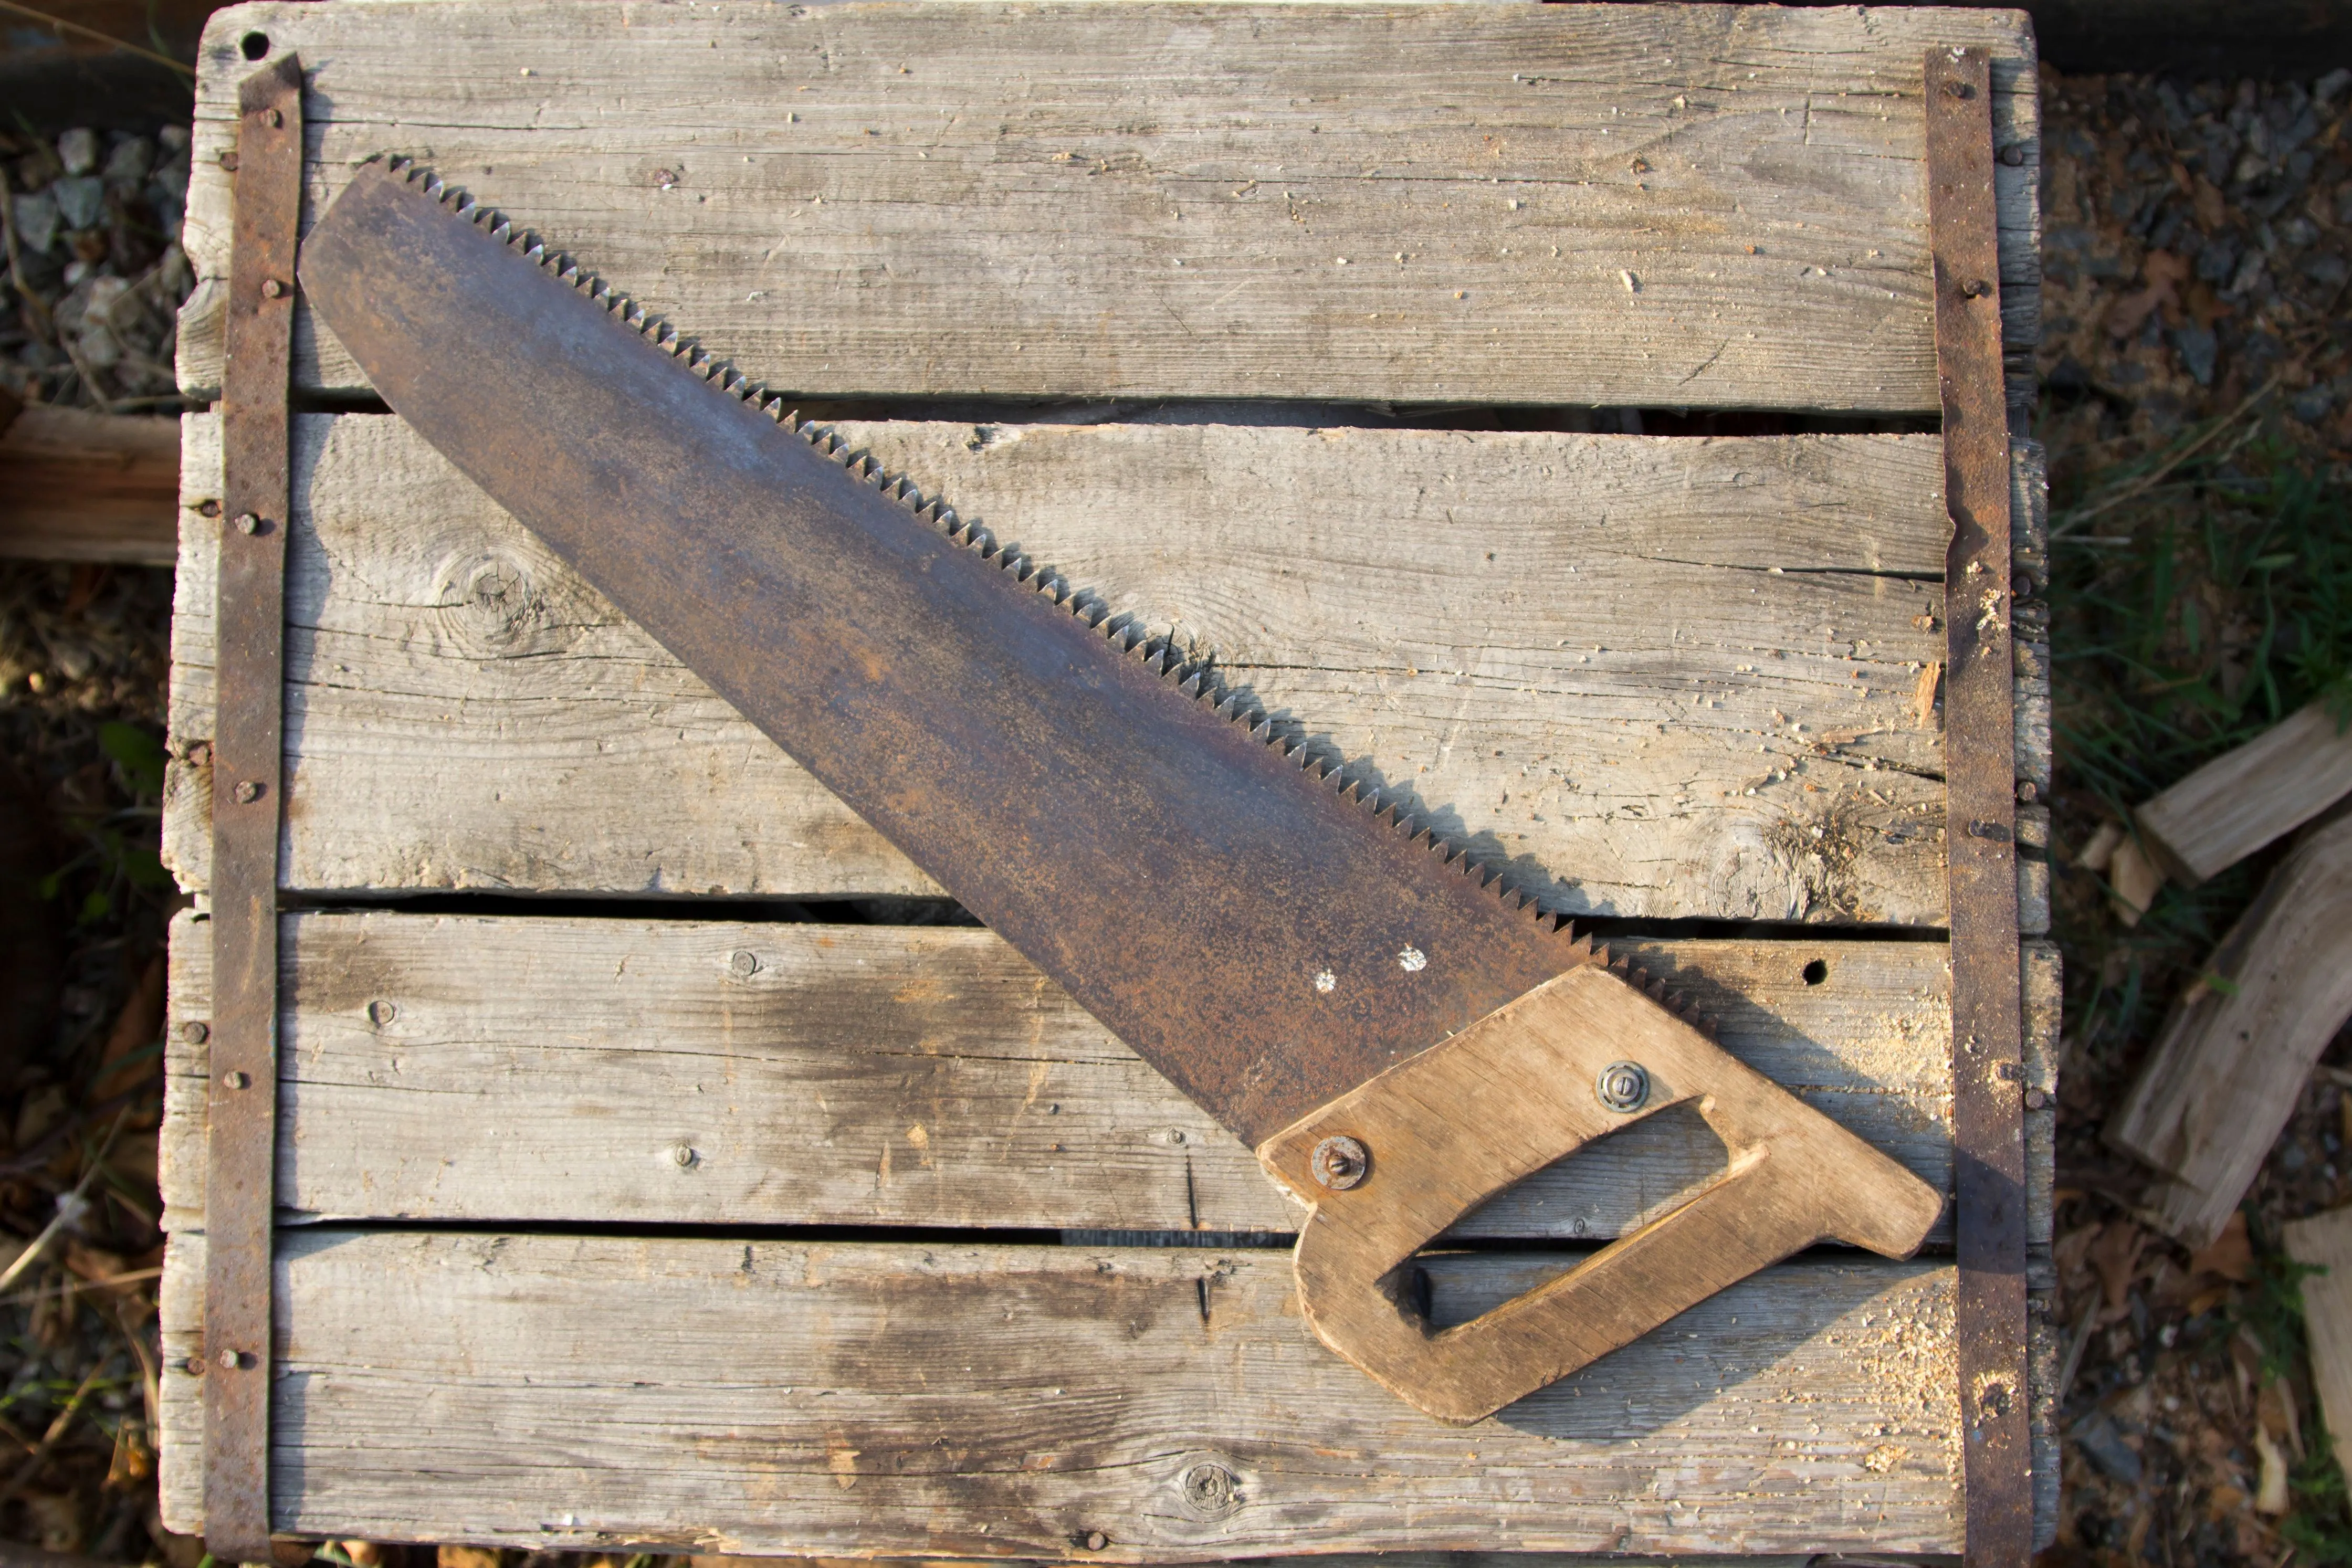
On saws: the heel of the blade (near the handle), and the handle medallion (if it’s a hand saw). The etch on the blade near the heel often carries the manufacturer name and quality grade.
On chisels and edge tools: the shoulder of the blade, the tang, or the back of the blade near the handle.
On wrenches and pliers: usually cast into the casting itself, on the handle shank.
Common abbreviations decoded:
- S.B.&D. = Stanley, Bostwick & Decker (early Stanley)
- H.D. Smith = H.D. Smith & Co. (Connecticut tool maker, 1880s–1940s)
- MF Co. = Millers Falls Company
- P.S.&W. = Peck, Stow and Wilcox (Southington, CT)
- O.V.B. = Our Very Best (hardware store house brand, usually made by Shapleigh or Winchester)
If you can read the mark but can’t place it, search “[maker name] + tools” and check the Antique & Collectible Tools database at TIAS (The Internet Antique Shop) or the EAIA (Early American Industries Association) resources.
Step 5 — Patent Dates vs. Manufacture Dates
This is the single most misunderstood thing about dating antique tools, and it trips up beginners constantly.
A stamp reading “Pat’d Oct 3, 1882” does NOT mean the tool was made in 1882. It means the design was patented in 1882. A tool with that stamp could have been made any time from 1882 up through the 1930s or even later if the manufacturer kept using the old stamp.
Patent dates are minimum-age anchors. If the patent stamp says 1882, the tool cannot be older than 1882. That’s all it tells you.
To actually date the tool, you need to combine the patent date with other evidence: the manufacturing quality, the japanning style, the handle material, the casting characteristics, and ideally the type-study features if it’s a tool like a Stanley plane where researchers have catalogued the exact feature changes across production years.
Stanley planes are the most studied example. Researchers like Patrick Leach (whose “Blood & Gore” type study guide is the collector bible) have mapped exactly which features correspond to which production years. A Stanley No. 4 with a certain frog design, lateral adjuster shape, and handle style can be dated to within a decade or so.
For most other tools, you’ll use patent dates plus general manufacturing characteristics to narrow the range to a decade rather than a specific year.
Step 6 — Where to Ask for Help
Even experienced collectors get stumped. The difference between an expert and a beginner is knowing where to ask.
Reddit — start here. Three subreddits are genuinely useful:
- r/whatisthisthing (~3M members): The largest identification community on the internet. Post a clear photo and you’ll typically have an answer within an hour. The community includes tool collectors, tradespeople, historians, and academics.
- r/handtools (~10K members): Smaller but deeply expert. If your mystery tool is a vintage hand tool, this community will identify it faster and with more context than anywhere else.
- r/Tools: Broader audience, good for modern and professional tools.
One important note about r/whatisthisthing: they explicitly ban copy-paste AI answers. Post your own photos and explain what you know — the community appreciates genuine curiosity.
EAIA (Early American Industries Association): The premier organization for American hand tool research. Their members are the people who wrote the books on tool identification. You can post to their forums even as a non-member.
MWTCA (Mid-West Tool Collectors Association): Similar to EAIA, with particular strength in Midwestern makers.
Facebook groups: “Vintage Hand Tool ID” and “Antique Tools” groups have tens of thousands of members and active identification threads. Response times are fast.
Our AI tool identifier: Start with WhatIsThisTool — upload a photo and get an immediate AI identification. It’s excellent for common tools and good for many vintage pieces. Where it’s weaker is extremely obscure specialties (like that coopers’ croze) or heavily corroded tools where the shape is hard to read. But it’s the fastest first step, and if the AI identifies it, you can move straight to valuation.
Step 7 — Valuation Once You Know What It Is
Once you have a name, valuation is straightforward. There are three sources worth using:
eBay sold listings: The only real market data. Go to eBay, search the tool name, then filter by “Sold Items.” You’re looking at what buyers actually paid, not what sellers hoped to get. This is your price guide.
Specialist dealers: Jim Bode Tools is the most respected dealer in American vintage tools. His catalog prices represent the premium retail market — they’re above what you’d pay at a flea market but reflect authenticated, described tools. Good for understanding what condition and completeness mean for value.
Collector price guides: The Antique Trader Tools Price Guide gives written ranges but goes out of date quickly. Use it for ballpark, use eBay sold listings for current reality.
A few variables that dramatically affect value: originality (replaced handles destroy collector value even if functionality is maintained), completeness (a plane without its blade is worth a fraction of a complete example), condition (working rust is different from pitting), and rarity (a common Stanley No. 4 in good condition is worth $30–$50; a Stanley No. 1 in excellent condition can hit $2,000+).
For detailed guidance on what specific vintage tools are worth, see our antique tool values guide.
The Tools You Need to Identify Tools
Ironic as it sounds, a few specific tools make the identification process much faster and more reliable.
A jeweler’s loupe (10×): Non-negotiable for reading maker’s marks. The BelOMO 10x triplet loupe is the standard choice — the triplet lens design eliminates the edge distortion you get with cheaper doublet loupes.
A pocket microscope (60–120×): For stamps that are too worn for a loupe. The Carson MicroBrite is inexpensive and has a built-in LED that makes worn stamps readable.
A digital caliper: For type studies on tools like Stanley planes, where the width of the frog adjustment screw slot or the diameter of the knob base corresponds to specific production years. You don’t need the $110 Mitutoyo for this — the $40 iGaging does the job.
Evapo-Rust: When a tool is too corroded to read, Evapo-Rust (not naval jelly, not wire-wheeling) reveals the surface underneath without damaging the metal. Critical for reading obscured maker’s marks.
Going Deeper
This seven-step framework handles about 80% of mystery tools. The other 20% are genuinely obscure — specialty trade tools from industries that no longer exist, regional maker’s marks that aren’t in any database, or tools so corroded that the diagnostic features are gone.
For those, the communities mentioned in Step 6 are your best resource. Post clear photos from multiple angles (top, bottom, side profile, close-up of any markings), describe the dimensions, and explain what you can figure out from the shape. The collective knowledge in r/whatisthisthing and the EAIA forums is remarkable.
For specific tool categories, check our identification guides:
- Stanley hand plane identification — the most studied category in vintage tools
- Vintage hand saw identification — reading Disston medallions, Atkins etches, and Simonds stamps
- Antique tool values — what to do once you know what you have
Frequently Asked Questions
Q: How accurate is AI tool identification for unusual or vintage tools? A: For common hand and power tools — wrenches, drills, common planes, screwdrivers — AI identification is highly accurate. For obscure vintage specialties like trade tools, agricultural implements, or regional makers, AI works best as a first step that narrows the category, followed by community identification for specifics.
Q: What’s the single best photo to take of a mystery tool? A: A flat lay from directly above, with the tool on a neutral background, in even natural light. Then a second photo of any maker’s marks or stamps. If there are moving parts, a third photo showing them extended or open. Avoid shadows across the working surface.
Q: Can I identify a tool just from its size and material without any markings? A: Often yes, especially if the shape is distinctive. Material and construction era together eliminate most possibilities. A forged steel single-piece tool with a wooden handle and no obvious brand tells you it’s pre-1950 American or European manufacture, which significantly narrows the field.
Q: Why do some old tools have multiple patent dates? A: Manufacturers added each patent date as new features were added. A tool might carry three patent dates spanning 20 years, representing design improvements made at different times. The newest date is the best minimum-age anchor.
Q: What does it mean if there’s no maker’s mark at all? A: Several possibilities: the mark is worn off, the tool is a hardware store house brand (these often went unmarked or used generic stamps), it’s a user-made or shop-made tool (common in trades before factory tools dominated), or it’s from a small regional maker whose marks aren’t in the reference databases.